Maternity Artemis Coat

I have spent a lot of time considering what kind of maternity outerwear to make as I wanted something suitable for maternity and beyond. I didn’t want to invest time and money making something I could only wear for a short time.

One problem I’ve encountered when it comes to maternity wear is that it is really tricky to find suitable ready to wear (RTW) clothing to fit tall pregnant women. I think I might have mentioned this in my last post, but it is annoying me enough to mention it again.

I am 5’11” and always find my arms are too long for RTW coats and jackets,  the second hand maternity one my friend lent me, while still lovely, is slightly too short in the sleeves for me.

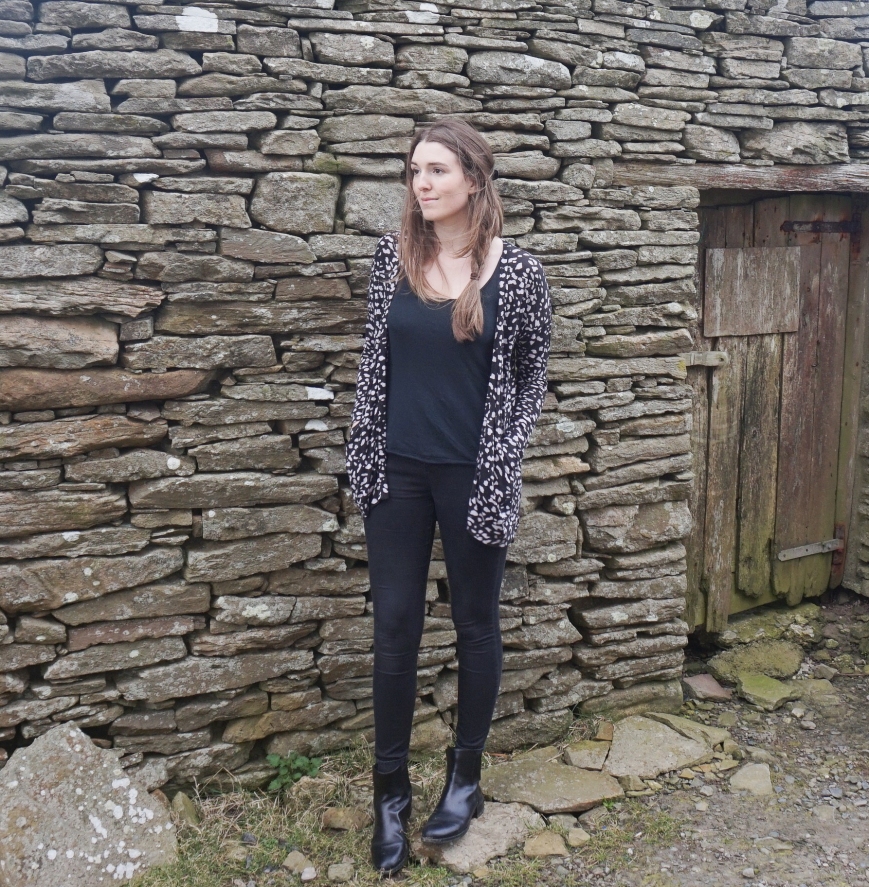
I decided on the Artemis pattern by I AM Patterns, a company I had never tried before. I’d had my eye on the pattern for ages and I’d seen some really nice ones popping up on Instagram. I was particularly drawn to the laid back, oversized style.

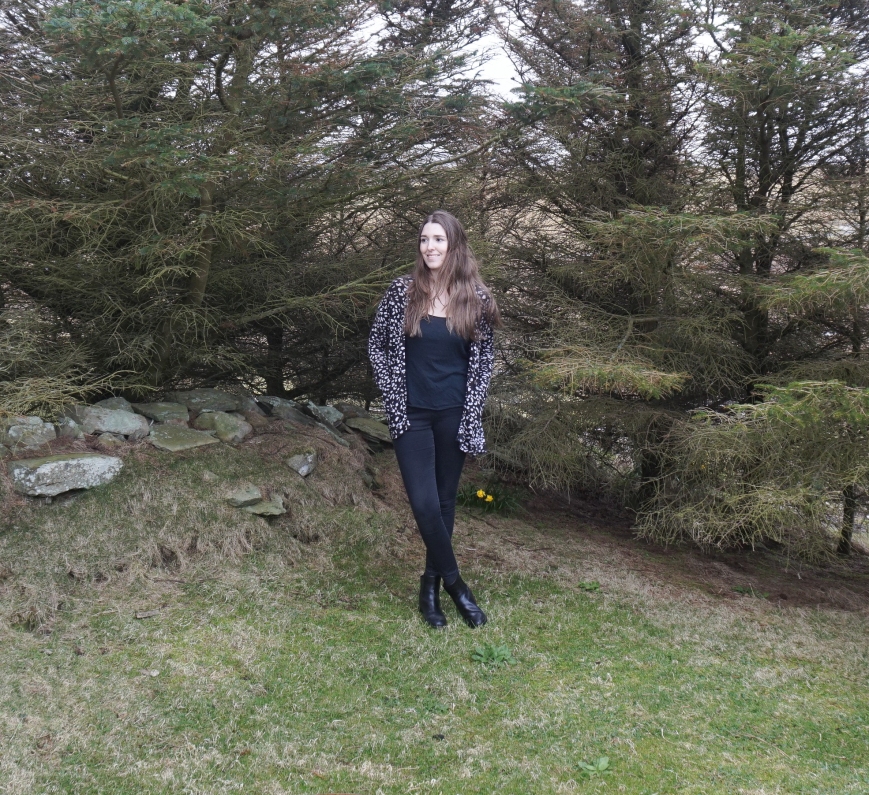
I had some leftover navy corduroy after making my maternity dungarees, and think it works really well with this pattern. I bought the corduroy from Merchant and Mills and I couldn’t recommend it enough. I seem to have a bit of a corduroy obsession right now, my last 3 projects have all been made using it.

Sizing wise I decided to go for the biggest size available, which I think was a UK 14? the fit is very oversized and even with my bump it is probably a bit big for me. I am not complaining though as I’m growing rapidly so extra room is always appreciated :).

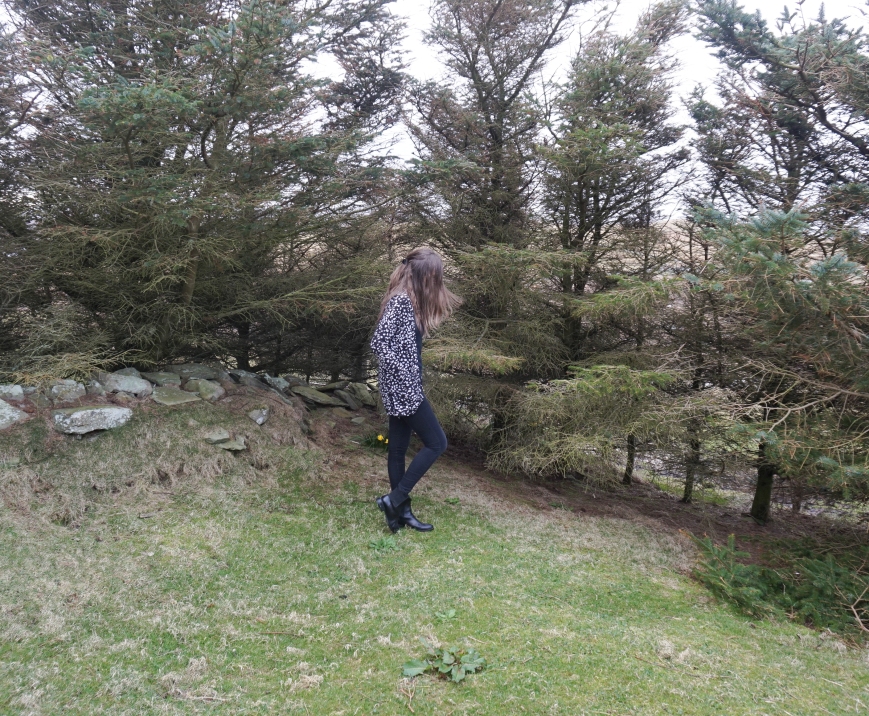
I didn’t make any adjustments to the pattern other than lengthening by 10cm , as I wanted it to cover my bum.

I didn’t lengthen the sleeves as I don’t think the pattern piece would have fit on the width of my fabric if I had, but I finished them with bias tape and used a small seam allowance, rather than double folding, to give me a bit more length and they hit at the perfect point on my wrist.

I used a combination of techniques to finish the seams, binding the pocket seams and sleeves with homemade polka dot bias tape and overlocking inside the sleeves where the seams wouldn’t be visible. I thought this would help reduce bulk at the underarm where the sleeves are cut on the bias. I worried that if I bound them they wouldn’t hang nicely.

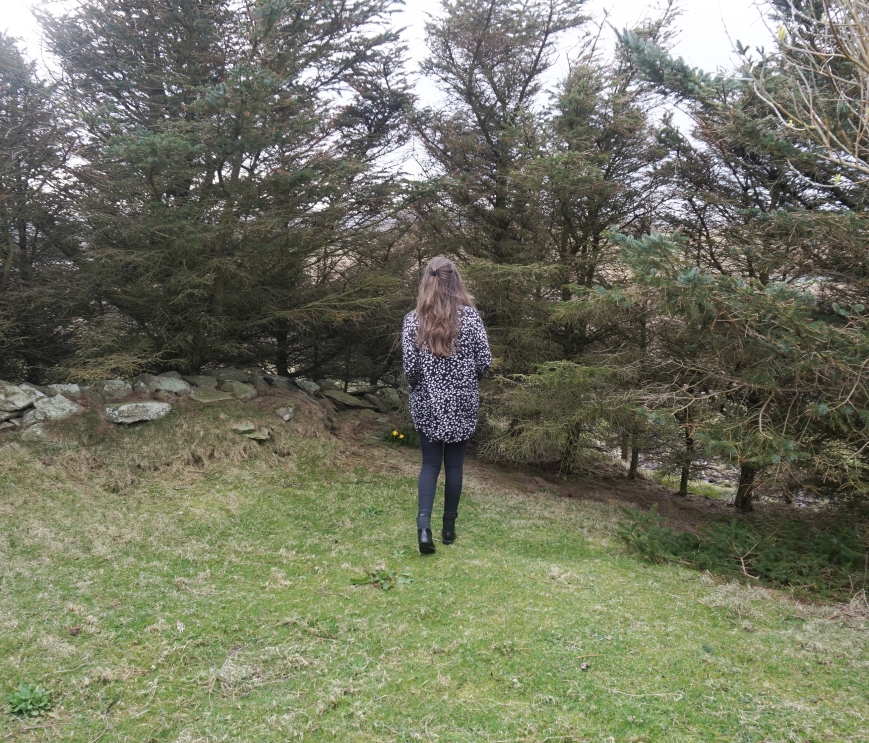
I didn’t originally add closures, but on wearing the coat out once in the Shetland wind I realised this was a mistake as it was blowing open and driving me mad. I covered some buttons in the corduroy and evenly spaced them down the front. I think they look really smart so I’m glad I made this addition.

In terms of the fit of the jacket and overall style, I am really happy with it, it feels really laid back and easy to wear. I do find with the low armholes I sometimes feel it a bit tight across the chest when I raise my arms and it sort of falls off my shoulders when I wear it, but this might be as it’s a bit big. I think without the baby bump to contend with I would have preferred to size down.

Overall though it is definitely serving its purpose as my maternity cover up and I hope I will continue to get a lot of wear out of this for years to come. I love the big pockets and the relaxed style, especially paired with my newly finished hand knit scarf which I will be sharing a blog post on soon.

Artemis Coat Attie and Dora Blog Maternity

Artemis Coat Side View Attie and Dora Blog


A Little Lawn Party Dress

I’m really excited to share my #alittlelawnparty dress with you. I was asked to be an ambassador for this spring themed sewing challenge by the organisers Atia @thebrightblooms and Mel @handmadebyditsytulip. There are lots of amazing prizes on offer so if you like the sound of making something spring themed you should definitely get involved. For more info check out this link.
When I was asked to get involved in this challenge it took me a while to figure out what to make. I was unsure as I don’t tend to sew seasonally. In Shetland there isn’t a massive distinction between what you wear season to season, you need to dress reasonably warm all year round. However, I thoroughly enjoyed choosing a pattern and fabric based on Spring, and it got me feeling all cheery and prepared for the changing weather, so maybe I should start doing more seasonal sewing.

The pattern I used is from the Stylish Dress Book, Simple Smocks, Dresses and Tops by Yoshiko Tsukiori. It is such a cool book. I actually got this book when I first started to sew, I made one top and then forgot about it. When I found it the other day I was overjoyed as I still absolutely love all the patterns in it. It was so funny sewing something up from this book again as I have come so far with my sewing abilities since I first used it. I remember struggling a bit with the first garment I made about 4 years ago, mostly as I didn’t know what bias binding was yet,  but this time it was a breeze.

The construction of the dress was fairly simple. The neckline is finished with bias binding, leaving it open at the ends so that the cord can be inserted through. All the rest of the construction is fairly standard as it is such a simple shape. I overlocked the seam allowances and finished the hem on the machine. The dress came together really nicely and the sleeves were a breeze to insert. I think this pattern is really well drafted, simple but effective.

I’m not sure if I chose the right size, as I went for a L. It does swamp me a little, but being tall I think I can pull off that oversized aesthetic. I also lengthened the skirt by 5cm to account for my height 5’11”. This was a good idea as it would have been far too short otherwise.

The fabric is by Atelier Brunette. I purchased it from Backstitch a couple of years ago. I didn’t know if this fabric choice was going to work with this pattern. I thought it might  look a bit like a moo moo or a nightie, but it is a beautiful colour and I think layered up with a cardigan it looks really good. Once the weather heats up a bit more, or if we go on holiday anywhere hot, it would be a really comfy summer dress.

I also included a photo below of my newly finished hand knit mohair cardigan. Another Needed Me Cardigan from Wool and the Gang. I wear my first one so much I thought I needed another. I love that this is a lighter colour than my first version as it works really well with more summery outfits. The great thing about mohair is it is so lightweight it works for cold and slightly warmer weather. I think with the weather in Shetland the dress with this cardigan is a more realistic example of how I will be wearing it.

I was really keen to take more photos outside, but it was so windy on the day that we couldn’t get a photo where you could distinguish the silhouette of the dress. So we had to move indoors. I’m excited to be able to do more outdoor scenery shoots again as the weather improves. These are my favourite to do and to share.

A Little Lawn Party Dress

Attie and Dora Pattern from Stylish Dress Book by Yoshiko Tsukiori

Attie and Dora Smock Dress and hand knit cardigan Wool and the Gang

Back view Attie and Dora. Dress from Stylish Dress book

A Little Lawn Party Dress Attie and Dora


SaveSave

SaveSave

Vintage Pledge 2017 Dress

I finished my 2017 Vintage Pledge dress just in time, on the penultimate day of the year.

This was an interesting project,  it took a long time to make despite not looking too complicated. This was mainly because I hacked the pattern and kept changing my mind about the style details.

The pattern was a gift from a family friend last Christmas. I posted a photo of the pattern cover on Instagram earlier this year as I had hoped sharing my intention to make this dress with the sewing community would spur me on to get it done. My major stumbling block was that I couldn’t make a decision about which fabric to use. I had an image in my head of a beautiful version in silk dupion, but as I had never attempted the pattern, that seemed a bit of a risky investment. Towards the end of the year I searched through my fabric stash and came upon  this forgotten peach cotton lawn from Atelier Brunette.

On finishing the toile I realised the style of the pattern wasn’t really to my taste. The full gathered skirt swamped me and looked very old-fashioned.

I shared some images of the toile on my Instagram stories seeking advice from my fellow makers about whether to proceed with the pattern as was, or to hack. The majority chose hack, so hack I did.

I drafted a completely new skirt, kept the cool back detail, and modified the front bodice to give me a bit more coverage across the bust.

The instructions included with the pattern weren’t the best, and as I had made so many changes I basically had to disregard them and make up my own anyway.

The original pattern called for a button closure, but I extended the wrap and added ties, which I prefer.

I decided to finish the front edges of the dress with bias binding, rather than facings, and I am please with how this turned out. I admit I did intend to finish all the seams with bias tape too, but I got lazy and overlocked most of the seams instead. I love to finish a garment really carefully so it is as beautiful on the inside as the outside and to extend its life, but I was worried that this dress might not turn out wearable, so I found I was a bit reluctant to invest so much time into beautiful seam finishes.

Happily, I am really pleased with how this dress turned out and really surprised by how much I love this colour on me – I really need to experiment more with colour. It was out of my comfort zone, but I’m so glad I went for it, as I think it really suits me.

IMG_0139

Vintage Pledge 2017 dress Attie and Dora 3

Vintage Pledge 2017 dress Attie and Dora 4

Vintage Pledge 2017 dress Attie and Dora

Vintage Pledge 2017 dress Attie and Dora 6

Vintage Pledge 2017 dress Attie and Dora 7


Silver Dora Dress

Hello!

It’s starting to feel very wintery up here in Shetland. The nights are drawing in and it’s getting really cold. I’ve been getting back into knitting and have been trying to use up the left over wool from my last two projects to make hats. I am also really getting into a bit of drawing and painting again. Anyway back to the sewing chat.

You may have seen my blog post at the end of October where I announced the launch of my first sewing pattern for sale on Etsy, the Dora Dress and Top. I was so excited to put it online and finally share what I have been working on. Thank you so much to those of you who left me lovely comments on here and on social media. I was so nervous to put it out into the wild, so I really appreciated the support :).

I have quite a few more Dora dress and top samples to share with you, so lets kick off today with my favourite version, the silver Dora Dress. I used this awesome silver pleated fabric from Stoff and Stil.

I was so excited to try working with this fabric as I had never seen anything like it. I really wanted to create a statement piece that would showcase this pattern.

Working with this fabric was odd, it was quite strange to cut as it has a 3D structure. I personally found the best way to deal with it was to stretch it out flat for the bodice pieces before cutting, which was a bit of a risky move, but seems to have payed off. Then for the skirt I just lightly held the pattern pieces against the fabric (not stretching it out this time) and cut them out with my rotary cutter.

The best thing about this fabric is it doesn’t fray so I didn’t have to finish seams or hem, which was a treat!

I did fully line this version in black cotton voile to make it comfy to wear, I worried the fabric might cling to my body otherwise. The pattern calls for a lined bodice only, but it is really easy to do a fully lined version. I basically just made another dress in the lining fabric and sewed the two together along the neckline, understitching to keep the lining from rolling out and making sure to hem the lining to be slightly shorter than the dress version.

I love my silver Dora Dress. I think in this fabric it will make a great Christmas or New Years Eve party dress.

Have you started making a party dress for the winter festivities yet?

Dora Dress Silver Plisse by Attie and Dora

Dora Dress by Attie and Dora Patterns Side viewDora dress by Attie and Dora Back View

Dora Dress by Attie and Dora Patterns

Dora Dress by Attie and Dora PDF

SaveSave

Introducing the Dora Dress and Top by Attie and Dora

Hello,

I am thrilled to let you know that I have just uploaded my first digital sewing pattern design for sale on Etsy. The pattern is sold as a digital PDF file which can be downloaded and printed at home. It is available in sizes 8-18.

Attie and Dora is a sewing pattern company based in Shetland, Scotland. All the patterns are designed, cut and graded by me, Eleanor Coutts. Each pattern is designed with the goal in mind of creating the ultimate between seasons capsule wardrobe.

The Dora Dress is a modern take on the traditional slip dress with a 3 part empire line bodice. The pattern includes the additional option to make a hip length top version.

The bodice finishes just under the bust and the skirt is slightly flared skimming the body, to give a flattering silhouette.

Dora is suitable for makers who already have some experience of garment sewing. It is a relatively easy sew, with no tricky closures to deal with, but looks best when made with slinky fabrics with a lot of drape.

I had some help in the development of the Dora Dress and top from my wonderful testers. I couldn’t have done it without you. Megan, Allison, Miriam, Jenny, Georgia, Hannah, Laura, Jennifer, Lizzie and Linda.

I also need to say a big thank you to Leanne, Lens in the Lane, the wonderful photographer who captured the photos below.

If you make a Dora Dress I would absolutely love to see how you got on. Please share your makes using the hashtags #sewingdora #attieanddorapatterns

Also check out my Etsy Shop if you would like to see more photos of the Dora Dress including my silver version 🙂

Dora Dress by Attie and Dora

Dora Dress by Attie and Dora

Dora Dress by Attie and Dora


SaveSave

SaveSave

SaveSave

Fern Shorts

This month I was asked to do some pattern testing for Afternoon Patterns.

Their new pattern, the Fern Shorts, is due to be released today, the 1st September 2017.

I was really excited to be asked to pattern test for them. I have followed and admired Afternoon patterns for a long time. If you haven’t heard of them check out their amazing website. I love the aesthetic of their designs and their printed pattern covers are gorgeous.

When I first heard that the pattern I would be testing was shorts I did have an ‘uh oh’ moment. As you know I live in Shetland, and it isn’t really known for its shorts weather :). However, the lovely Jenny of Afternoon patterns mentioned that they would look great sewn up in lightweight wool fabrics and worn with tights, so I knew I wanted to go in this direction to get the most wear out of them all year round.

I had a piece of cotton and wool blend liberty fabric in my stash that was gifted to me by a really kind friend who knows how obsessed I am with fabric. It was 1.85m length which just happened to be the perfect length for this project so I felt it was fate.

I am so happy with how these turned out. I was nervous about the fit as I have struggled in the past to find shorts that I feel comfortable in, but I think these are really flattering. I did lengthen them by 2cm on the “lengthen or shorten here” line and that seems to have given me the perfect amount of room and they don’t ride up or feel remotely tight. I did size up to make sure they were loose fitting as I feel self conscious in tight shorts.

I would thoroughly recommend this pattern. It was a fun sew and I love my Fern Shorts. I can see myself wearing them a lot as they can be dressed up or down. The fabric is so soft, I could even get away with wearing them without tights on warmer days in the summer.

Fern Shorts Afternoon Patterns made by Attie and Dora

7

Fern Shorts Afternoon Patterns made by Attie and Dora

Fern Shorts Afternoon Patterns made by Attie and Dora


Chambray Kalle Shirt Dress

Hello!

Sorry I’ve been a bit quiet recently. We were on holiday, then moved house so I have been rather busy.

Anyway. I got my new sewing room set up, and finished this Kalle shirtdress (pattern by Closet Case Patterns).

Kalle Shirt Dress 2

I didn’t make any modifications, which was silly as it is a bit short for me. I also possibly should have sized down. For some strange reason I cut a size larger than I would normally. I think I thought it would look good even more oversized.

However, I still think it’s a great pattern. I will definitely make another in the right size. I am planning to make one in a slightly lighter weight fabric with more drape. Will let you know how it goes.

I am really into the style of this garment. I love how effortless, yet put together, it looks.

The fabric was some chambray from Merchant and Mills. It’s really soft and comfy to wear. Plus I love the colour.

Aaron and I took these photos on a beautiful evening in Burra. These photos were taken at 8pm. I love how bright Shetland is at night in the summer. We even spotted a whale on the way home, which was so exciting. Oh, and a wave splashed into my boot while I was trying to pose near the waters edge, the perils of blogging.

DSC08340

DSC08349

Attie and Dora

Emptying my sea water filled shoe

Attie and Dora Kalle Shirt Dress

Attie and Dora Kalle Shirt Side

Attie and Dora Handmade Outfit


Driftless Cardigan

Just a quick post today. I wanted to show you the Driftless cardigan I made this week. The pattern is by Grainline Studio and it gets a big thumbs up from me.  I love the design and it came together really quickly on the overlocker.

The pattern calls for a medium weight knit and I wasn’t sure if this really soft and stretchy hacci sweater knit fabric from Girl Charlee UK would suit the pattern, but I think it worked. The fabric drapes beautifully and I feel effortlessly chic in this cardigan.

I actually made no alterations to the pattern for my height and it fits really well. I think if I make this again in a sturdier knit, I will add a bit of length to the bodice and sleeves, as I’m guessing the stretchiness of the fabric is having an effect on the fit.

I’ve already ordered more fabric to make more of these, so keep an eye out for more versions coming soon.

Driftless Cardigan Front

Driftless Cardigan Side

Driftless Cardigan Front

Driftless Cardigan Back

10 Things People Who Love Sewing Do

Making Jeans buttons

  1. Stand on pins, sometimes they go in really deep and you have to pull them out while trying not to cry…glamourous.
  2. Bore their friends and family by talking about sewing. That glazed eye look that comes over people who don’t sew, as soon as you get into your full sewing-chat flow.
  3. Become instant friends with anyone who sews bypassing all social norms about getting to know people, and going straight to getting excited about each others WIPs (see point 9.)
  4. Cry with frustration over a dud garment or sewing mistake.
  5. Spend all their money on fabric and patterns some of which you will probably never get around to using, but will just enjoy looking at.
  6. Make a mess. Some days (most days) your sewing room will look like a bomb has gone off in a lint bin.
  7. Become obsessed with Instagram. Partner: For gods sake go to sleep what are you doing on your phone? You: yeh yeh I’m finished *turns down screen brightness and continues to scroll surreptitiously under the covers* (those bloggers new makes aren’t going to like themselves).
  8. See flaws in their handmade garments that no one else can and point them all out to anyone who compliments you on a handmade garment you are wearing.
  9. Speak in sewing jargon that only dedicated sewing blog readers will understand. For example: WIP (work in progress), UFO (unfinished object), not to mention all the pattern names we all know and love.
  10. Become bored of shopping for clothes and you will not believe that something finally brought your shopping habit to a halt. Although you’ve probably just substituted clothes shopping for fabric shopping, but sshh lets feel smug for a little while longer.

Ogden Cami Dress

If you write a sewing blog you will know how frustrating it is when you make a plan to finally take photos of that fabulous new dress you have made, only to discover that it is pouring with rain.

Well today Aaron, who takes most of my blog photos, and I decided we would brave the rain and take the photos anyway.

It was a pretty hilarious experience and very luckily after being soaked by rain, chased by waves and watched by curious seals, we actually came home with some good photos of my latest make.

I bought the Ogden Cami pattern, by True Bias, as soon as the news of it’s release dropped into my inbox. I absolutely love the design, and instantly had visions of a dress version.

If you follow me on Instagram you might have seen my first attempt at this pattern. I made one for my mum for her birthday with some silk from India. It fit her beautifully and I was inspired to try making another for myself.

The fabric I used was from Merchant and Mills and is a lovely hand block print summer weight cotton from Jaipur. I bought it intending to make a shirt dress, but it occurred to me that it would look pretty awesome as an Ogden cami, I am glad I went with my instincts.

For both myself and my mum’s version I added 5cm to the length of the top (we are both tall). Then, for my dress version, I just extended the existing design lines until the length of the blouse was sufficient to achieve a midi length dress. I roughly estimated the length I’d need by holding a tape measure against my body.

The construction of this pattern is so simple, but so effective. I love the rouleau straps and the facing/modesty shelf. It’s such a satisfying, but quick sew, and there are so many amazing versions appearing on Instagram for inspiration.

I am so happy with this make, it is such a great pattern, I will definitely be making more of these.


ogden-cami-merchant-and-mills-fabric-attie-and-dora

attieanddora-ogden-cami
attieanddora

attieanddora-shetland

attie-and-dora