Hello!
It’s been ages, so let me explain why. Firstly I was down in London doing an intensive pattern cutting course for most of August (I will tell you more about that soon) and secondly, I have been working on a special project for a while now…
I spent the last few months making a bridesmaid dress for a friend’s wedding. It was a challenging project for me as it was the first time I have made something to fit someone other than myself, the fabric was velvet (enough said) and it was for a wedding, so obviously the pressure was on.
The pattern I used was the Lilou dress from ‘Love at First Stitch’ by Tilly and the Buttons. I had already made this dress twice, here and here, so I was confident with the contruction.
This was the first time I had to fit a garment to someone else, and it was great to learn new fitting techniques. I made two toiles using floral cotton. The first I made using a straight size closest to Marjolein’s measurements.
When she tried on the first toile, she felt the waist was sitting slightly low, so I removed 1cm from the length of the bodice. The overall fit was good, but there was significant pooling of fabric at the back, which I felt indicated she may have a sway back? This amused Marjolein no end (“I have a what back?”). I pinched out the excess which was approximately 5cm, and did a sway back adjustment on the back bodice pattern piece.
The second toile (see below) with these new adjustments fit well, so I got on and made the final dress.

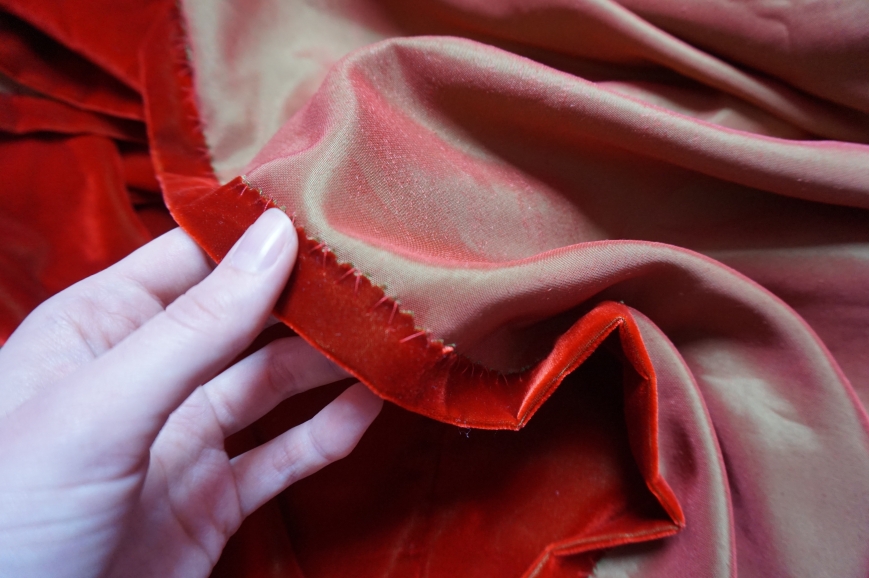
I have to say when I first saw the velvet I was besotted. It’s probably the most beautiful fabric I have ever worked with. The way it reflects light and drapes is divine. However, I quickly realised it was also going to be the most tricky fabric I had ever worked with.

Now I know everyone says velvet is a nightmare, but man, I had no idea how much of a nightmare.
Have you ever tried to cut the stuff? I will admit i was terrified, I researched loads before I started this make as I was concious of only having one piece of fabric to work with and therefore, no room for error.
The main things I learned through my “working with velvet” research are as follows:
1. Never ever iron velvet, just don’t even go there (I used steam and my fingers to press seams and remove creases)
2. Tack every seam to prevent slipping or movement of fabric during sewing (I mainly did two rows for extra stability)
3. Normal machine needles work fine for woven backed velvet
4. Silk or cotton thread would give best results, but polyester is also okay (i used cotton thread with good results)
5. Velvet has nap, so make sure all pattern pieces are the same direction
The main resource I used was this By Hand London post, and I also picked the brains of some very knowledgable sewing pals who gave me some excellent guidance.
Cutting the fabric was dreadful, it moved all over the place, as though it were liquid. I didn’t cut my pattern pieces on the fold because I was worried it would be difficult to achieve a symmetrical result .
As an alternative to ironing, I hung the fabric up for a day before cutting to let gravity remove some of the creases.
I layed the fabric out wrong side up and traced around the pattern pieces using my wonderful chalk roller pen and used a rotary cutter to cut for accuracy. I used pins to mark out the direction of the nap on the fabric before flipping it over to make sure I cut all the pieces in the right direction. I cut all my pattern pieces with the nap going from top to bottom (i.e. from shoulder to hem).
When it came to sewing it up, as I mentioned above, tacking really was critical and I did tack every seam by hand before stitching the seams, darts etc.
I found that for sewing on the machine (which I did for the darts and the longer seams) using a lower tension and slightly longer stitch length worked best. The needle left visible marks in the velvet, so ripping out mistakes wasn’t really an option. I took my time over each step to make sure I didn’t make too many mistakes.
When it came to choosing a method for finishing the seam allowances, I tried a scrap of velvet on my overlocker as a test, but thought it looked messy and in the end decided to pink the seam allowances. This worked well, it looked neater than overlocking and as the bodice was lined, most of the seams were hidden anyway.
I used a lovely floral cotton lawn for the lining from Sew Over It, which worked well.

The skirt was gathered, so I drew out the rectangles for the skirt pattern pieces with a width twice that of the waist. I wanted a good amount of gathers, without too much bulk. I wasn’t confident about how much extra fabric to add for gathering and in an ideal world I would have done a trial run to see how it looked, but had to make an educated guess and luckily the width I chose worked well and it wasn’t too bulky, as I had feared.
The zip insertion was by far the worst part of the process. The thing would not lie flat. I spent so long tacking it in and ripping it back out (luckily tacking by hand didn’t leave marks like the machine stitches) until eventually I was happy with how it looked.
I left the dress to hang over night to let the hem drop, levelled it, pinked it and turned it up to give a 3cm hem depth and used a hemming stitch to hand sew it up.
I ended up sewing quite a lot of this dress by hand, and although it was time consuming, I felt I had more control sewing by hand than I did on the machine, so I think it was worth it in the end.
So here’s the finished product …

Photo taken by Mike Guest
I am so pleased with how it turned out, especially after putting so much effort into this project. The velvet meant everything took so much longer than with a regular fabric, but it was worth it.
It was a joy to see Marjolein wearing it on the wedding day. I felt honoured to have contributed to Floortje and Tim’s special day.
Phew! Velvet is tough! Cotton for the next project I think 🙂