Flowery Breeks (Trousers)

Hi!

This was a quick project which I have really enjoyed making. I thought it would be fun to make something a bit outside my comfort zone and different from my usual style.

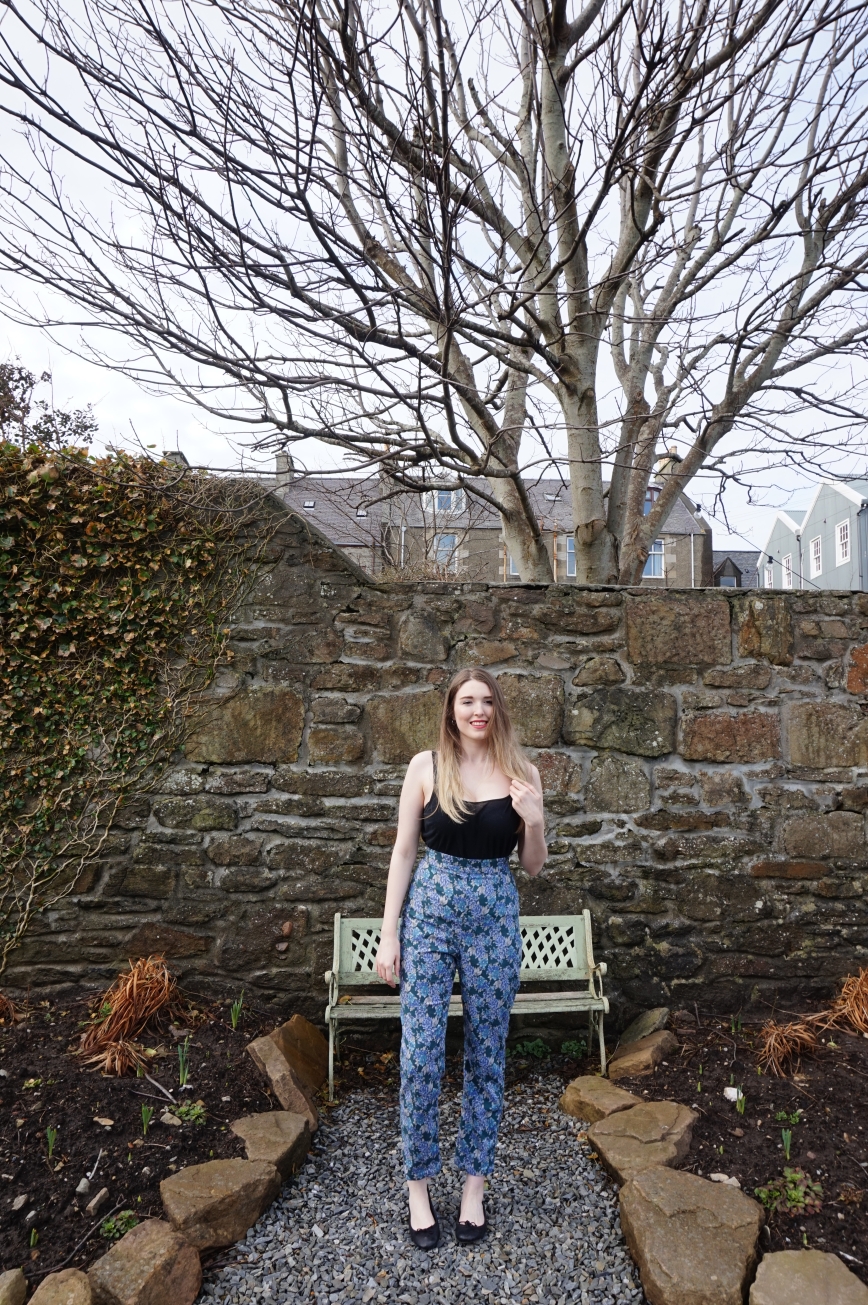
I had high hopes for these flowery Ultimate Trousers (Pattern by Sew Over It) and they didn’t disappoint.

I decided to adapt these to a high waisted version using this tutorial. I found Lisa Comfort’s instructions really detailed and simple to follow. Just a side note – I have been really enjoying the Sew Over It Youtube videos lately, if you haven’t already checked them out have a look.

I followed Lisa’s advice and made a toile of the original pattern to check the fit before I made the high waist adjustment.

My fit modifications of the original trousers were minor, I just added 5cm to the length of the hem to account for my height. I then followed the instructions in the tutorial (mentioned above) to raise the waistline to my natural waist and drew a pattern piece for the waistband.

The fabric I chose was from Sew Over It’s online store. I really love their fabrics, I buy from them a lot and am yet to be disappointed. I wish I’d bought more of this material as I think it would make a lovely shirt dress.

I am really happy with these trousers. It’s a style I have always loved, but I have never found suitable ready to wear versions. They were always far too short for me in the leg and the body, but drafting the high waist from your own measurements means you get the perfect length for your torso, which is far more flattering and comfortable.

Flowery Ultimate Trousers


Flowery Ultimate Trousers

Flowery Ultimate Trousers

Flowery Ultimate Trousers

We took these photos early this morning, so now I am off for a day of relaxing. My plan is to make homemade pizza, go for a walk and do some more knitting. I’ve recently started knitting my first handmade garment and I am really enjoying the process. I’m planning to make a very chunky cardigan. I bought some beautiful wool from Jamieson’s called Mirrie Dancers (Shetland term for the Northern Lights), it’s a dark navy colour with flecks of various other colours which are only visible in the light. It will be interesting to see how it goes as I have no idea what I am doing, but I find knitting really relaxing.

Bye Bye Birdie Vintage Pledge Dress 2016

This year I signed up to the Vintage Pledge challenge for the second time. Last year I pledged to try my first vintage pattern and this is what I made. I really enjoyed the challenge and loved the resulting dress, so thought I would give it another go this year.

My pledge for 2016 was to try and sew at least 3 of the vintage patterns in my stash.

The first I have chosen to make is this pattern:

DSC03646

which if you follow me on Instagram you may have seen me mention a few times.

This was kind of an odd choice for me as I am not a fan of 80’s fashion and if I’m honest I didn’t immediately like the style, but something about it grew on me and looking past the shoulder pads I could see potential.

I thought that the shape of view B was quite minimalistic and modern looking and chose a fabric with a modern feel to reflect this. I bought the black Bye Bye Birdie Atelier Brunette fabric from Sew Over It’s online store. I have used Atelier Brunette fabric before here and the quality is sublime, I am a big fan.

I found the construction of this dress really odd, particularly the collar construction. I am used to assembling the collar separately, topstitching and then sewing it between the facing and the dress, but in these instructions you sort of attached it piece by piece, first sewing the undercollar to the neck edge of the bodice, then the top collar to the facing and finally sewing the top collar and facing piece to the undercollar and bodice piece. The topstitiching was done after, and personally I found this method confusing, however I got there and to be honest I don’t think the method was bad, I think it was just the fact that it was new to me that threw me a bit.

The other thing I have to remark upon is the really odd zip placement. The top is very loose fitting and kind of boxy, and the zip is placed 1/4 of the way down the bodice through the waist and into the skirt. I found my zip stuck out oddly at the middle of my back where there was excess fabric. I ended up having to remove the long zip and just insert a 9 inch zip into the C.B. of the skirt starting at the waistline and this seems to suffice as the top is so loose fitting I can pull it over my head fairly easily. I am not sure if this was an oversight in the drafting or whether I added too much fabric when I made my lengthening modifications for my height (adding 5cm to the length of top and skirt). It may have been worth removing the excess fabric from the back, but I liked the look of it, so I kept it in and changed the zip position, as mentioned, to overcome this.

Another thing to mention is I left off the belt as I didn’t feel it was required and I added a snap fastener to the inside of the lapel to hold everything in place.

Here is my version of the dress

Vintage Pledge Dress 2016 Bye Bye Birdie Fabric

Vintage Pledge 2016

Vintage Pledge Dress atelier brunetteI am actually quite shocked by how much I love this. I really didn’t expect to like it as much as I do. I think this is one of my favourite makes to date and I love the style! I might be a fan of 80’s fashion after all.

I originally tried to take photos at the very scenic Noss Sound, but it was freezing, windy and started to snow, so we abandoned the mission and took some photos before Sunday dinner at my parents house instead. I left a couple of the Noss sound shots in as even though they weren’t the best images to show the detail of the dress, they sort of act as action shots….